
Now that your opportunity has been created, you have the option to notify a list of contacts. There are 3 ways for you to notify your contacts that you want to access your opportunity.
If you already have a system or process for inviting users to your opportunities that you are happy with, you may continue to use that method. Simply copy the access link from the Step 4- Invitation page into your message or invitation. Your contact will follow the link which brings them to the login page where they will either log in or register for a login and password. Once logged in, they will have an Invited Access link on their dashboard for your opportunity. They will be able to click on that link and access your opportunity.
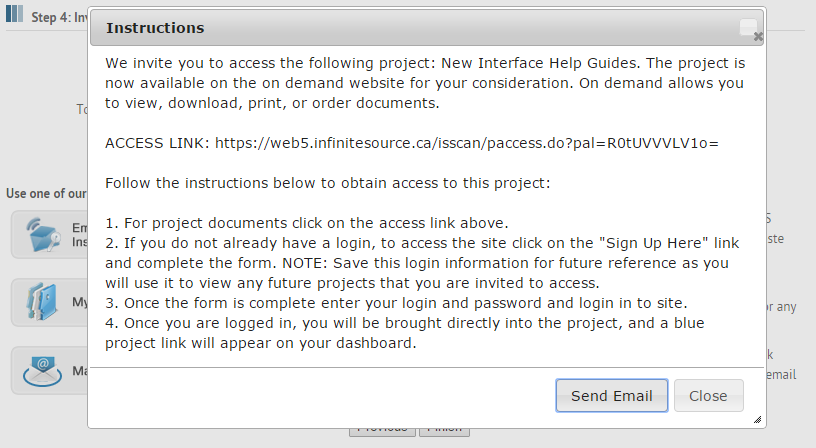
If you do not have a standard message you have sent out to contacts in the past, or you are looking for some direction in providing instructions to your contacts, you may use our pre-formatted message. The Email Access Instructions button will open our standard access instructions for you to view or copy. If you click on the Send Email button, the message will open in your default mail program (ie: Microsoft Outlook) where you can send it to a distribution list.
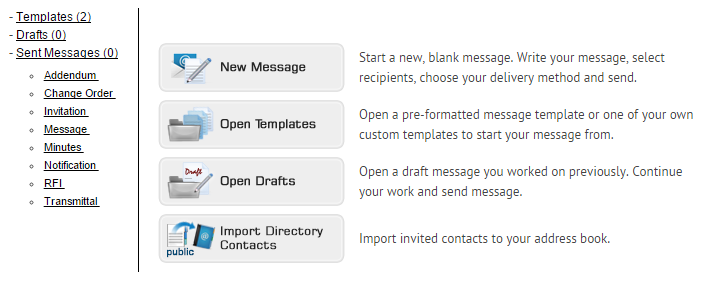
The Mail Center provides tools to send both email and fax messages. You can choose from a number of standard and custom message templates, or create your own message. Generate a recipients list by choosing entries from the Public Directory or your private Address Book, importing a list, or entering data for a single use recipient. For more detailed instructions on using the Mail Center, Click Here.
When you click Finish in the Opportunity Setup window, you will be brought back to your Dashboard where you will have a link to the opportunity you just created for future access.