Print Documents
When looking at a document in the SourceViewer, there is a Printing option that will allow you to print out entire documents or a small portion or detail of a document to scale.
Print to Scale
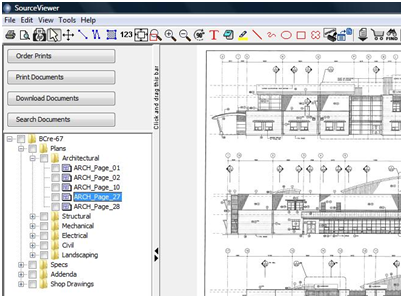
Step 1 - Select the Document to Print
- Using the document tree in the SourceViewer, navigate to the document you would like to print.
- Click on the Document to view it in the right hand window, this is the document that will be printed.
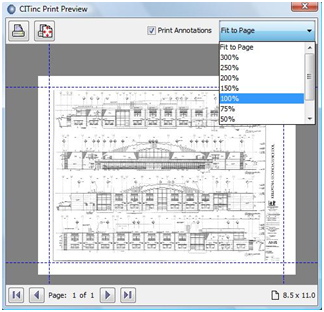
Step 2 - Print the Document
- With the correct document selected, click on the Print Preview icon on the toolbar.

- Check or uncheck the Print Annotations box to print the correct version of the document
- To change the page size, orientation and margins, click on the Page Setup icon in the preview window.
- Choose the scale and click Print.
|
 |
Print a Detail
Using the Print and Print Preview icons in the SourceViewer toolbar allows you to print the portion of a document that you need rather than having to order the entire document from a reprographer.
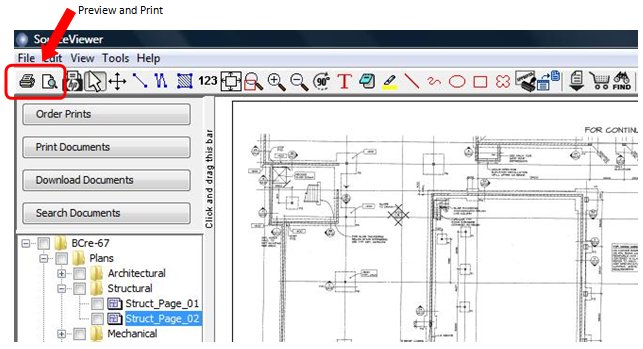
Step 1 - Select the Detail
- After you have the document open in the SourceViewer, your next step is to zoom into the area with the detail you wish to print.
- There are multiple ways to zoom:
- The easiest way to isolate a small section is to use the Box Zoom

- With the Box Zoom, click one corner of the area you want to view then move to the opposite corner and click to close the box.
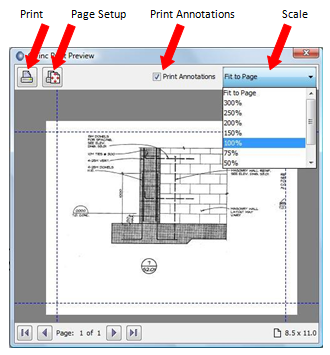
Step 2 - Print the Detail
- With your screen zoomed in on the area you want to print, click Print Preview
- Check or uncheck the Print Annotations box to print the correct version of the document.
- To change the page size, orientation and margins, click on Page Setup in the preview window.
- Choose the scale and click Print.
|
 |