Add a Project

Each project file in your planroom will contain folders used to organize and manage your project documents and provide easy access to all pertinent information to your colleagues and external users. You will naturally have plans, specifications and addenda posted in the project file, but you can also post any other kind of document you may require for the project: minutes of meetings, special instructions, site photos, progress photos, RFI's, change orders, etc.

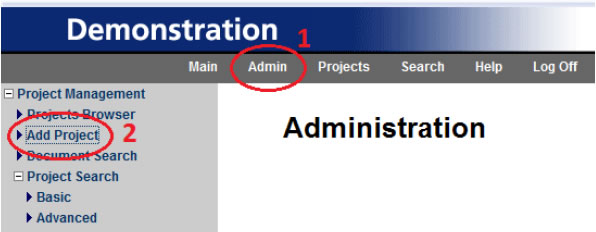
  1. To create a new project in your planroom, click “Admin” on the top menu bar.
  2. Click “Add Project” in the Project Management menu.
    add project
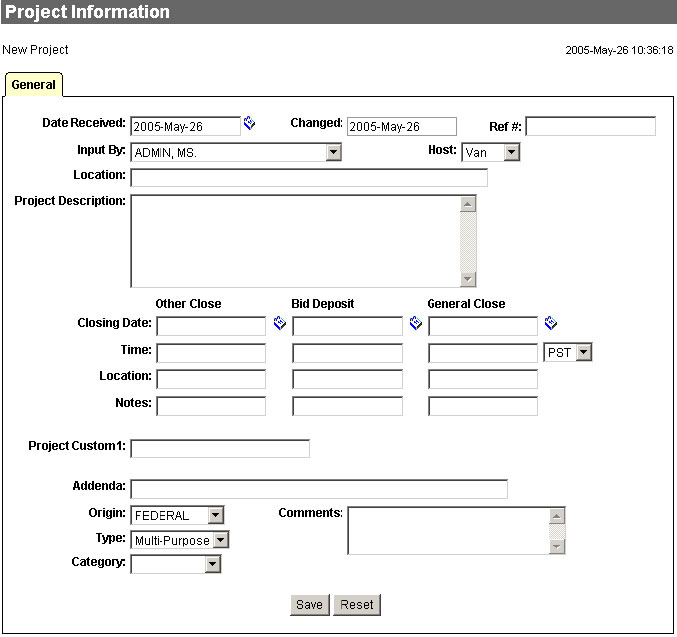
  3. Enter the general project information in the form.
    add project
  4. A project number will be automatically generated by the system once you save this page, but the Reference # field can be used to enter your own Project number as reference.
  5. Click “Save“. Once the information is saved, some or all of the following tabs will appear in the project file depending on your planroom setup: Status, Mail and Documents. You can now enter additional information about this project in these tabs.
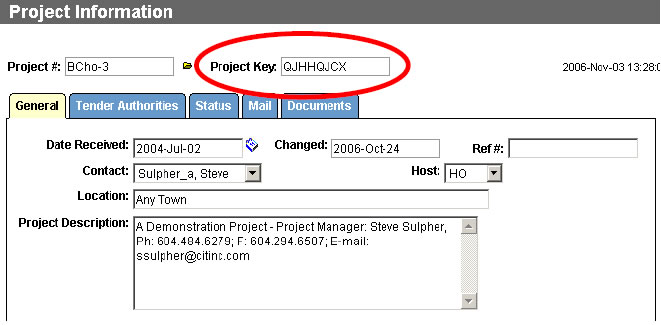
    Note: Make note of the “Project Key” that appears above the tabs of the project file. This Project Key will be used to direct your trades through Registration for your project.
    project key