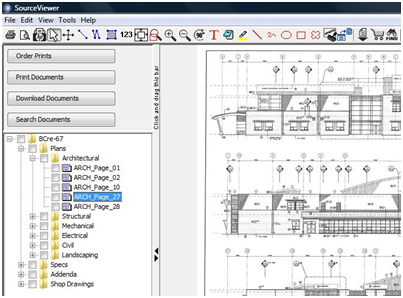
Print Documents
When looking at a project document in the SourceViewer, there is a Printing option that will allow you to print out entire documents or a small portion or detail of a document to scale.
Print to Scale
There are 2 options for printing entire documents to scale using the SourceViewer tools for Print Preview and HP Instant Print.
Option 1 - Batch Printing with HP Instant Printing
Like the name suggests, in order to use this print function, you must have an HP printer linked to the computer you are working from. Using HP Instant Print, you will be able to print multiple documents at once.
|
Step 1 - Select the Documents to Print
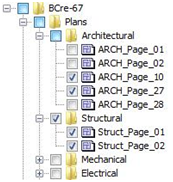
- Using the check boxes next to the folders and documents in the document tree, select the documents you would like to print.
- Clicking on the check box again will remove the checkmark if you have selected one my mistake.
|
 |
Step 2 - Install HP Instant Print
- Now that you have the documents selected, click on the HP Print icon

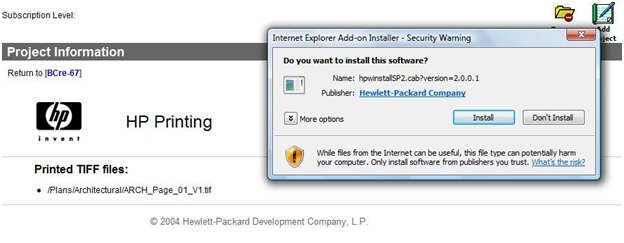
- A new window will open and the HP Instant Print software will start to download. You may been to authorize the program or alter your security settings to allow the software to download.
Step 3 - Select a Printer
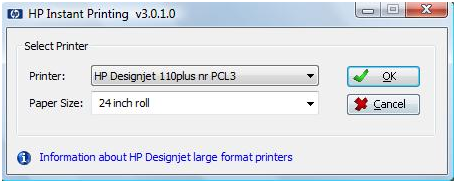
- When the install is complete, a new window will ask you to select which printer you would like to send the job to.
- Using the drop-down list, select the correct printer and page size settings and click OK.
Option 2 - Standard Printing
With the standard printing option, any brand of printer can be used. Unlike the batch printing capabilities with the HP printing, standard printing is one document at a time.
Step 1 - Select the Document to Print
- Using the document tree in the SourceViewer, navigate to the document you would like to print.
- Click on the Document to view it in the right hand window, this is the document that will be printed.
Step 2 - Print the Document
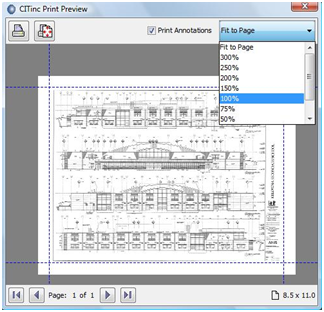
- With the correct document selected, click on the Print Preview icon on the toolbar.

- Check or uncheck the Print Annotations box to print the correct version of the document
- To change the page size, orientation and margins, click on the Page Setup icon in the preview window.
- Choose the scale and click Print.
|
 |
Print a Detail
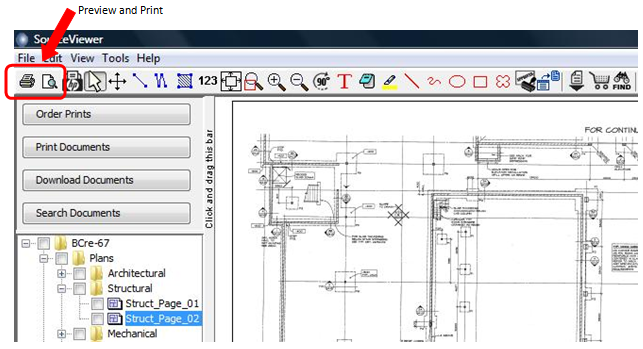
Using the Print and Print Preview icons in the SourceViewer toolbar allows you to print the portion of a document that you need rather than having to order the entire document from a reprographer.
Step 1 - Select the Detail
- After you have the document open in the SourceViewer, your next step is to zoom into the area with the detail you wish to print.
- There are multiple ways to zoom:
- The easiest way to isolate a small section is to use the Box Zoom

- With the Box Zoom, click one corner of the area you want to view then move to the opposite corner and click to close the box.
Step 2 - Print the Detail
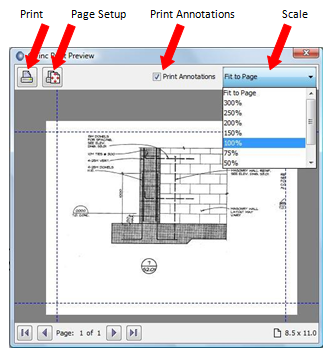
- With your screen zoomed in on the area you want to print, click Print Preview

- Check or uncheck the Print Annotations box to print the correct version of the document.
- To change the page size, orientation and margins, click on Page Setup in the preview window.
- Choose the scale and click Print.
|
 |


