Add a User
Once you have companies in your database, it is time to populate the user database. Using the Trade Registration from the previous section will allow your users to add themselves to
your database without any administrative intervention from you, or you can add your users in
manually using the Add User function.
- Click 'Admin' in the top menu bar and select Add User in the User Management menu
on the left.

- Fill in the name and position.
- Click on Copy Company Address to automatically fill in all company information.
- These fields are editable and can be changed if the individual has different
contact info than the company.
- Enter in the email address.
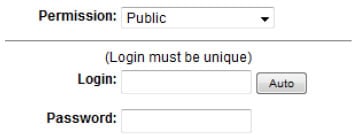
- Leave the permission level at PUBLIC for all users except for admin users.
- Use the Auto button to automatically generate a username and password.

- Enter the expiry date for the user. As they get close to the expiry date, if they are an
active user, the date will be automatically moved ahead.
- Place a checkmark in the approved box.
- Select the appropriate default notification type (fax or email).
- Click 'Add' at the bottom of the page. You will get a User Successfully Added window.
From here choose View User.
- By the Login and Password fields, under the Auto button used previously, there is now a
'Send Login' button. Clicking on this button will email the user their login information as
well as your website address to access your Planroom.


