Adding Folders
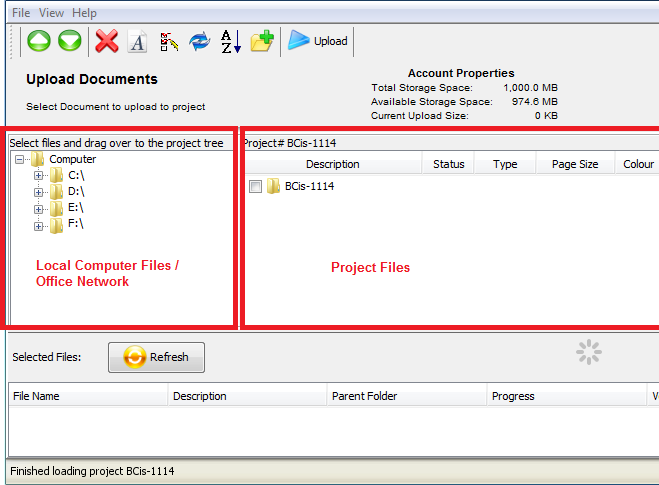
To create or copy a folder, open your opportunity and open the File Manager from the Tools Menu. The File Manager will open in a new window.
Your local computer and network files will be available on the left hand side and the folders and files in your opportunity are on the right. The first time you open the File Manager all you will see on the right is the root folder.
NOTE: If you have your documents in a folder structure on your computer, skip to Post Documents. If you need to create your folder structure from scratch within the opportunity, continue with the next step.
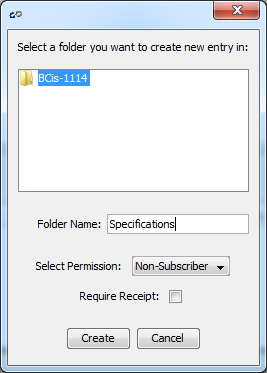
From the top toolbar of icons, select the 'New Folder' icon
- In the pop-up window, select the destination folder for the new folder you are creating. For your first folder, select the root folder as the desination.
- Type in the name of the new folder in the Folder Name field.
- In the Select Permission field, choose the lowest level of access you would like to see the folder and its contents.
- Place a checkmark in the Receipt box if applicable.
- place a receipt on a document/folder to require all users to provide positive confirmation that they received access to it prior to them viewing, downloading, printing or ordering. All confirmations will be tracked in the Activity Report. Anyone who does not confirm access to the document/folder will not be granted access.
- Click Create to add the folder. Repeat this process for each new folder you need in your project then move on to the next section, Post Documents.
|
|
Next Step: Post Documents