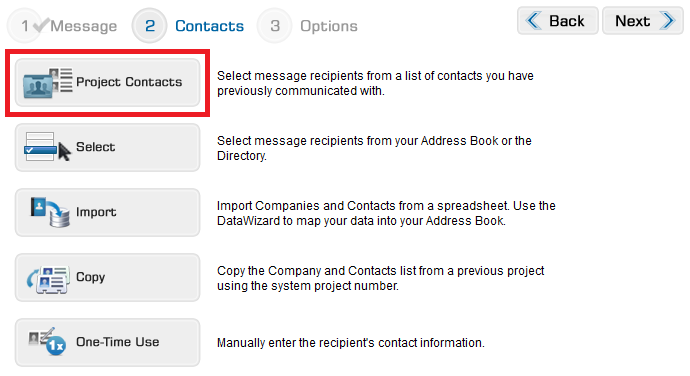
If you have previously sent a message on this project, and/or a contact has accessed this project, you have project contacts. Use the Project Contacts feature to add contacts you have previously communicated with and contacts who have accessed your project to your message.
When you click on the Project Contacts button in Step 2 of sending a message, you will be brought to the following page, similar to the Select page. There are 2 main sections on this page:
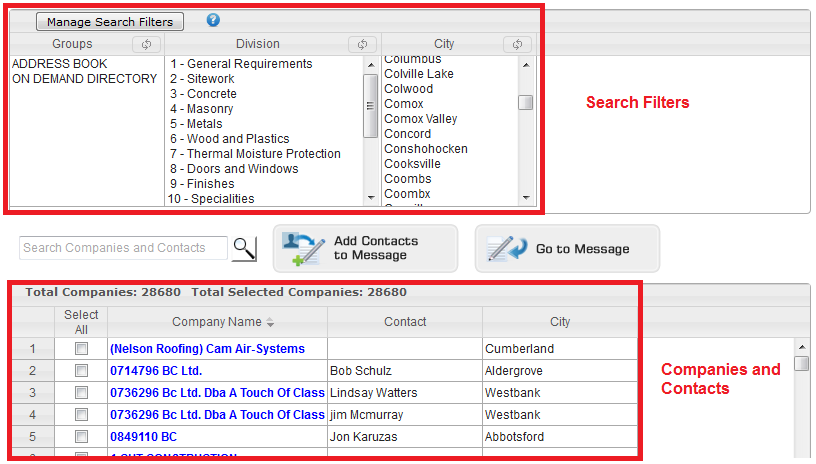
The top of the page displays Search Filters. These will allow you to provide specific requirements for the companies displayed in the bottom window. The default setting for the Search Filters is Groups, Divisions and Cities. Click on the Manage Search Filters button at the top of the page to add/remove filters.
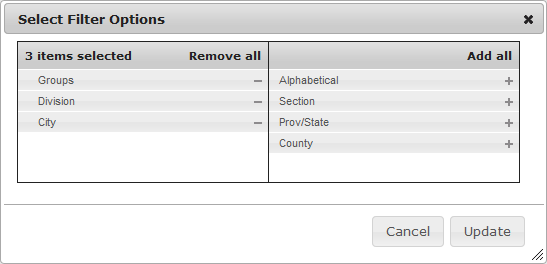
The filters listed on the left are selected and the filters on the right are additional ones. You can add from the list on the right by clicking on one of the entries or click Add All to move all remaining filters to the left window. If you want to remove active items, you can either click on the filter you wish to remove, or click Remove All. The selected filters will move to the right window where you can re-activate them at any time. When you are finished with your changes, click Update to return to the previous window.
When you edit your search filters, the columns available in the filter table will change to match. Use these columns starting from the left to refine the company/contact list below. When you click on an item in your filter list, it will highlight orange, and the filter lists to the right will adjust to display the filtered information (example: if you select Division = 3 - Concrete, your list of Cities and Contacts will be only those who have Concrete as part of their Scope of Work).
You may select as few or as many items in each column as necessary to provide the contacts you need. As you click additional filters they will also highlight. If you wish to remove all selected filters in one column use the refresh button in the header.
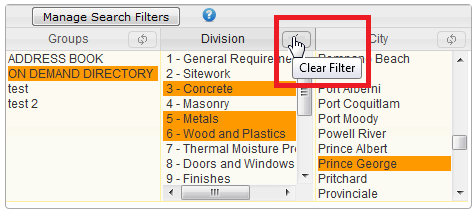
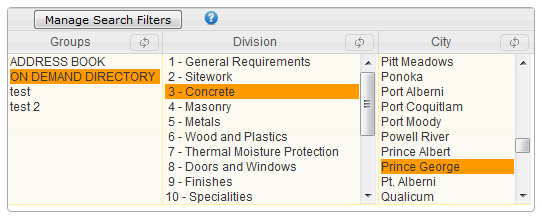
With your first combination of filters set, (example above: Group = On Demand Directory; Division = 3 - Concrete; City = Prince George) the list of contacts and their companies at the bottom of the page will display the entries that meet your filter requirements.
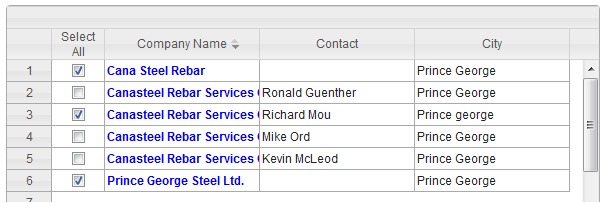
In the bottom table where the contacts and their companies are listed, use the checkboxes next to the entries you would like to add to your message. With your contacts checked, click the Add Contacts to Message button between the 2 tables.
The page will refresh and your selected contacts will be added to your recipient list. You can now adjust your filters if necessary to select additional contacts. With your new filters set, check the contacts and click Add Contacts to Message. Repeat this process until you have your entire recipient list created. When you are finished, click Go to Message.
Once you are back in your message, you will see your selected recipients in the table at the bottom of the Step 2 - Contacts page. Here you may use the ![]() to remove contacts and you may use any of the following features to add more contacts to your list:
to remove contacts and you may use any of the following features to add more contacts to your list:
If your recipient list is complete, click Next to move to Step 3 - Options