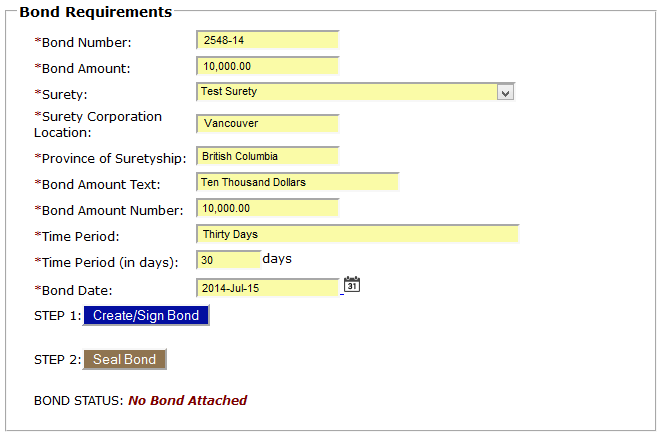
Once you have received approval for your Power of Attorney request from a Surety, you will be able to create a bond. Fill in the Bond Requirements form with all of the applicable information.
Below the form, you will find the Bond Request Form with all of the detail you will need. Once all of the fields are complete with the correct information, click Create/Sign Bond.
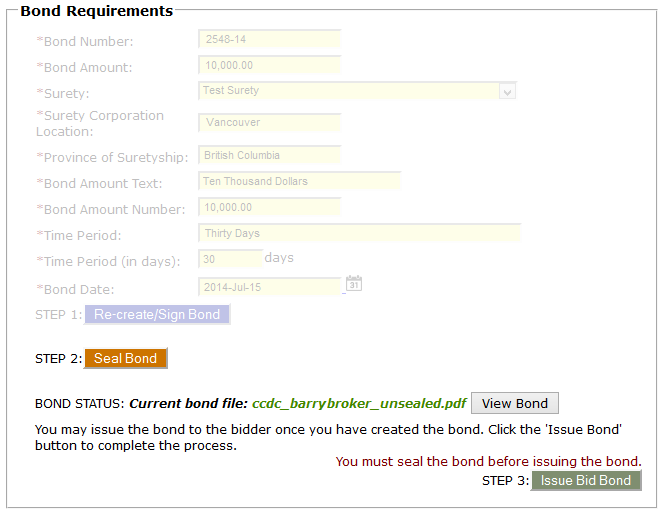
After the Bond has been created, the page will refresh and you will have the option to view and seal it. Click on View Bond to ensure that all of the information was entered and is displaying correctly. If any changes need to be made, modify the information in the Bond Requirements form and click Re-create/Sign Bond.
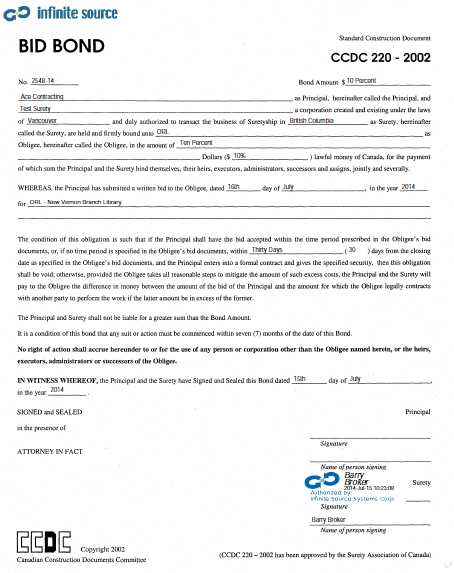
When viewing your bond, you will notice that along with all of the standard Bond information, the Surety's logo and a digital signature have been added to the document.
Next Step: Seal the Bond
Other Bonding related help pages: