Download the latest version of BridgeChecker from the official AccessAgility website. After downloading the installer, open it and follow the instructions below:

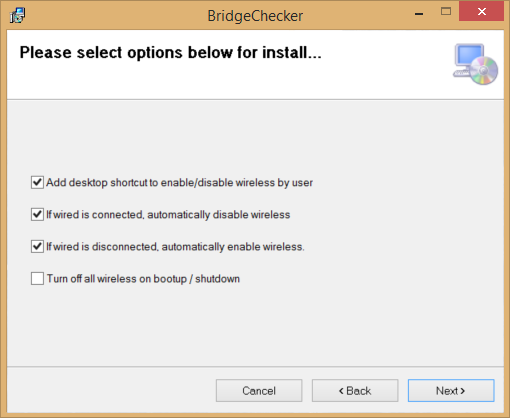
The options window allows specific configuration options for the BridgeChecker installation, as well as application. Choose preferred options and click Next.

Add desktop shortcut to enable/disable wireless by user
Checking this option places a shortcut on the desktop to allow a standard Windows user to enable/disable the wireless interface.
If wired is connected, automatically disable wireless
Checking this option will disable wireless adapters automatically if wired adapter is connected.
If wired is disconnected, automatically enable wireless
Checking this option will automatically enable wireless adapter if wired is not connected.
Turn off all wireless on bootup / shutdown
Checking this option will disable wireless adapter on system shutdown and startup.

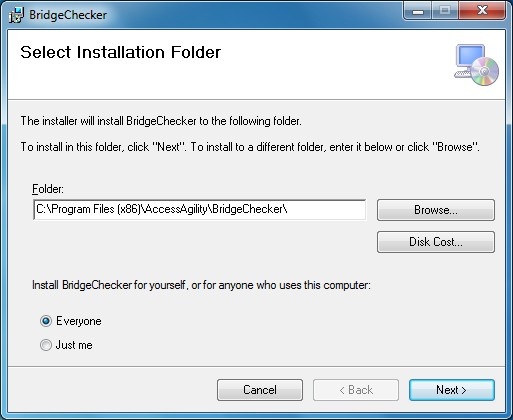
Choose a folder to store the BridgeChecker files. Then, choose whether BridgeChecker will be used for every user profile on the computer, or just the current user profile. Click “Next.”


Finish completing the installation and BridgeChecker will be running in the background without any further input needed.
Known Issues
If the Provider load failure error is reported at any time, there is an issue with .NET framework version on computer. Please follow the link below to correct this issue:
If above does not correct the issue, uninstall BridgeChecker and uninstall .NET 4.5 framework, then reinstall .NET 4.5 framework. After successful installation of .NET 4.5 framework, install BridgeChecker.
- Introduction
- > Installation
- Known Issues
- Managing BridgeChecker
- Policy & Adapter Settings
- BridgeChecker Policy Settings
- System Adapter List
- Options
- Adapter List
- Add New Adapters
- Options
- Licensing BridgeChecker
- Exit Configuration Manager
- Additional Installation Options
- Microsoft Group Policy
- Using ProgramData File to Duplicate Configuration
- Using Microsoft Msiexec
- Sample Command